How to Make a 3D-Printed LED Neon Sign: The Complete Guide
A 3D-printed neon sign is a printed channel that follows your lettering, with a flexible LED neon strip pressed into it. The strip gives the soft, even glow of real glass neon; the printed channel holds it in shape, hides the joints and mounts to a wall or a clear backing. This guide takes you from nothing to a lit sign: what to buy, how to design the sign so it prints, and how to assemble, wire and hang it.
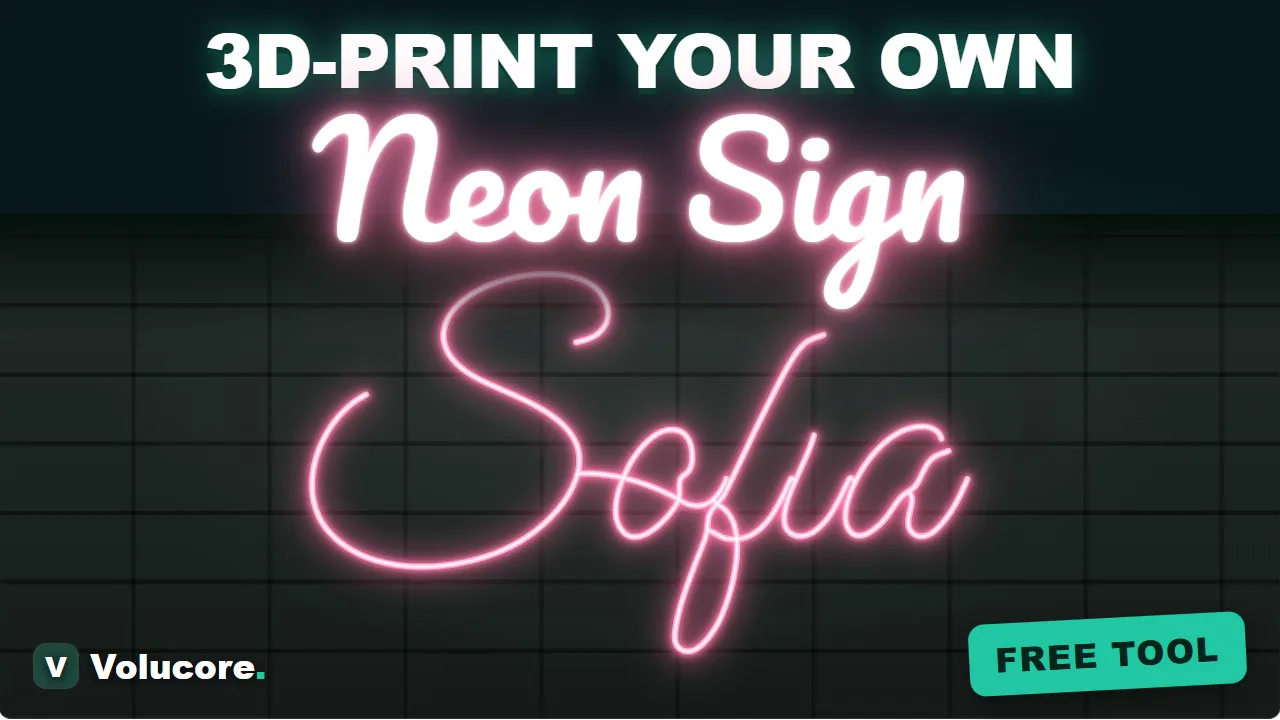
What you need
- A 3D printer. Any printer works, because a large sign is split into pieces that fit your bed. A 180 mm bed prints it too, just in more pieces.
- Filament. PLA is fine indoors. PETG is better if the sign will sit in a hot spot, such as a sunny window. White prints reflect more light inside the channel; black prints look like a dark frame around the glow.
- An LED neon strip (silicone “neon flex”) of the side-bend type, 12 V or 24 V. Buy it first, because its size decides the channel width. See LED neon strip sizes and fit.
- A power supply that matches the strip voltage, with some headroom. See how to wire and power an LED neon sign.
- Small parts: strip end caps or silicone sealant, wire connectors or a soldering iron with heat-shrink tubing, super glue or a plastic-friendly adhesive, and a way to mount the sign (screws and standoffs, foam tape or a clear acrylic backing).
Step 1: choose the strip before you design
Most neon strips sold for signs are a rectangle in cross-section. The most common size is 6 × 12 mm, and it is the default in the Neon Sign tool. The 6 mm side goes across the channel and the 12 mm side stands up out of it. Different brands vary by up to half a millimetre, so measure your own strip with calipers rather than trusting the label.
Choose a side-bend strip, the kind that bends flat like a ribbon lying on its side. A top-bend strip bends the other way and will not follow lettering. If you are unsure, order a short sample first; a one-metre piece is enough to test the fit.
Step 2: type the name and choose a font
Open the tool and type up to four lines. The font decides how the strip runs, so choose it with the strip in mind. A single-line script font gives one tube that follows the pen stroke, like handwriting, and can run a whole word as one continuous piece. An outline font gives two tubes, one around each edge of every letter, and uses more strip. The tool offers 21 fonts, six of them single-line, and you can upload your own. Single-line vs outline fonts explains the trade-offs.
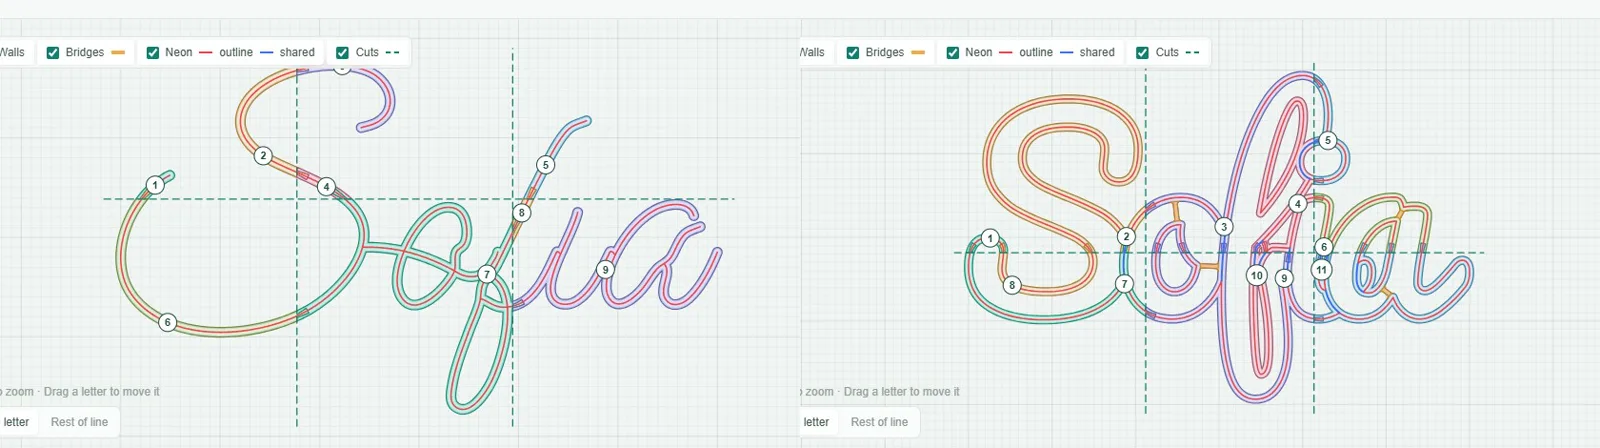
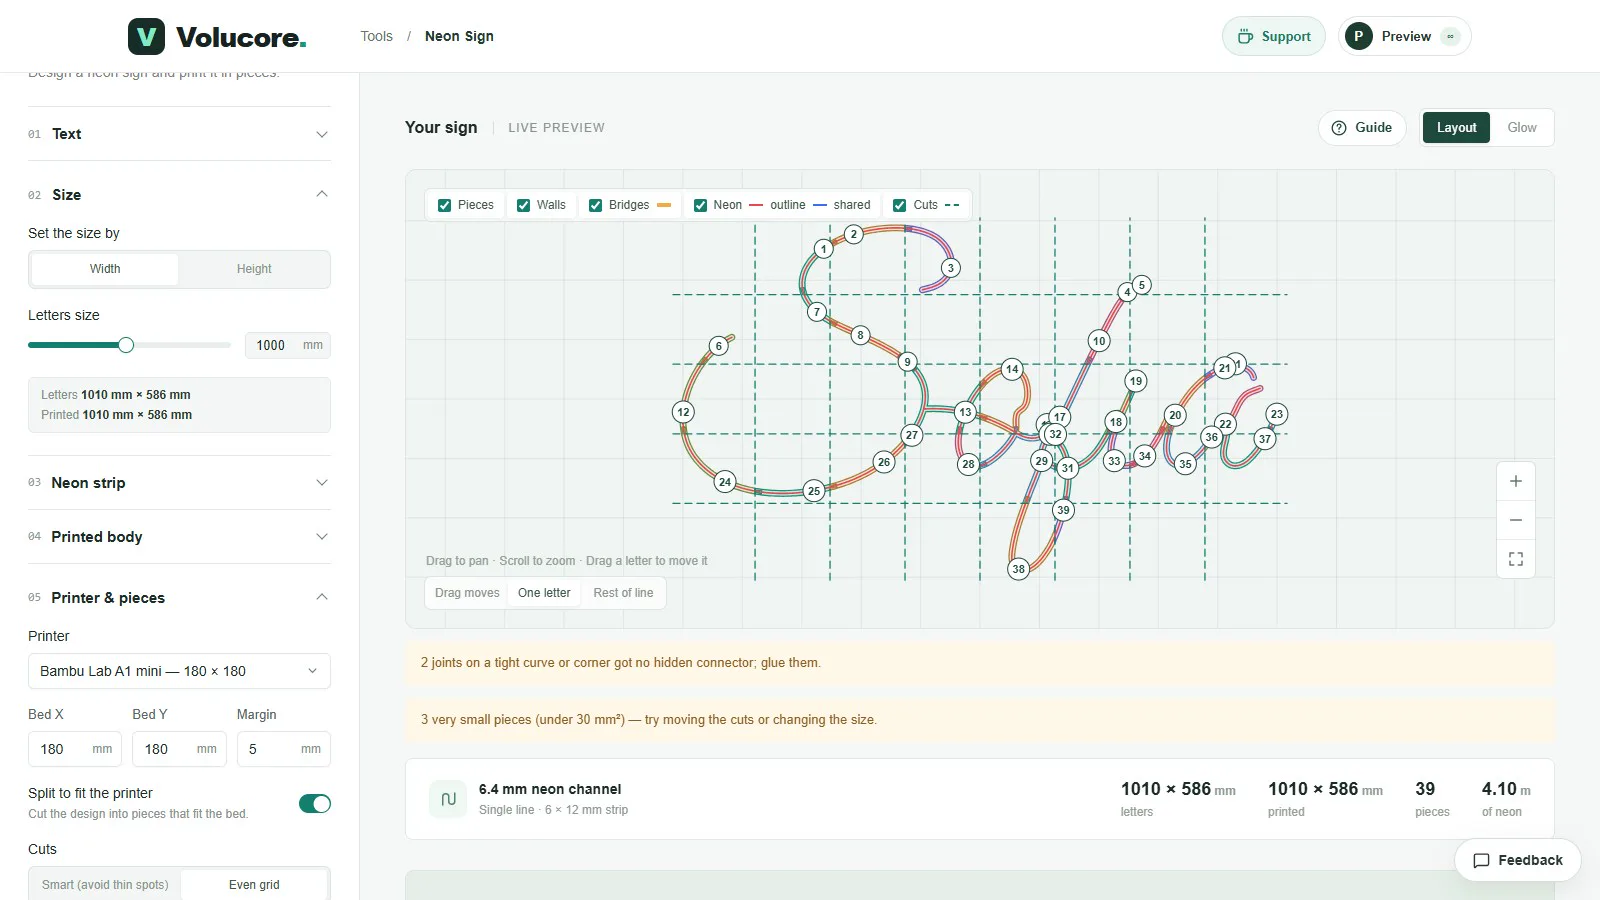
In the layout view you can drag any letter to move it or overlap it. Set Drag moves to “One letter” to nudge a single letter, or “Rest of line” to open or close a gap and carry everything after it. Where outline letters overlap they share one neon line, shown in blue, so you do not waste strip or print two tubes on top of each other.
Step 3: set the size
You can set the size by width or by height. A name sign of 40 to 60 cm across is a good first project: big enough to look like a sign, small enough to print in an evening or two. The tool shows the finished size, the number of pieces and the length of neon you need, so you know how much strip to buy before you print anything.
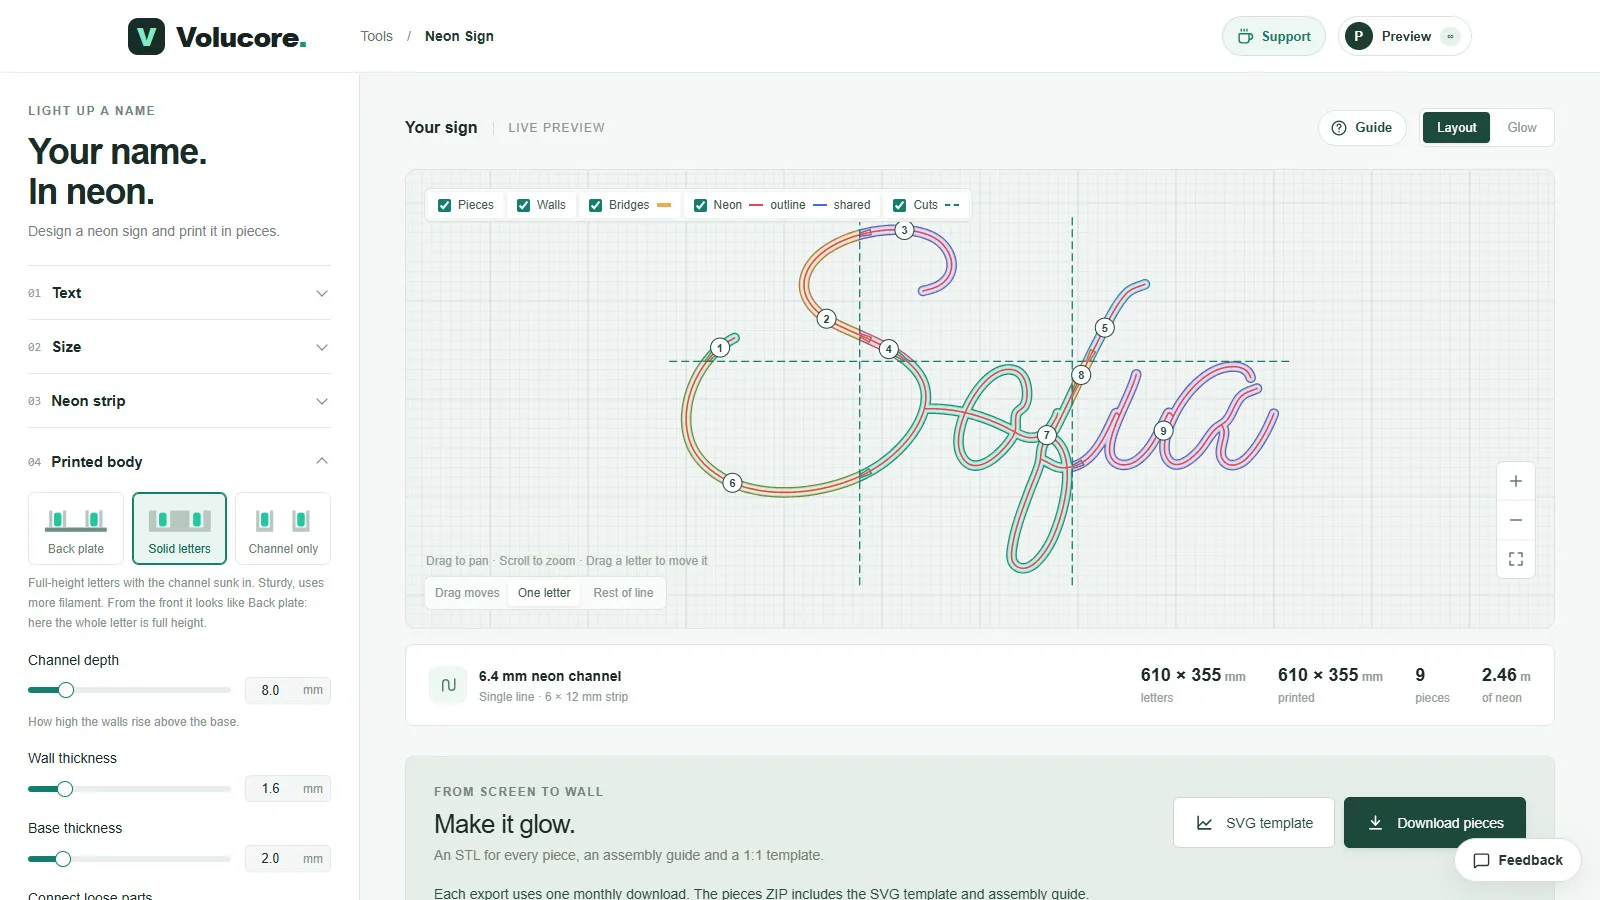
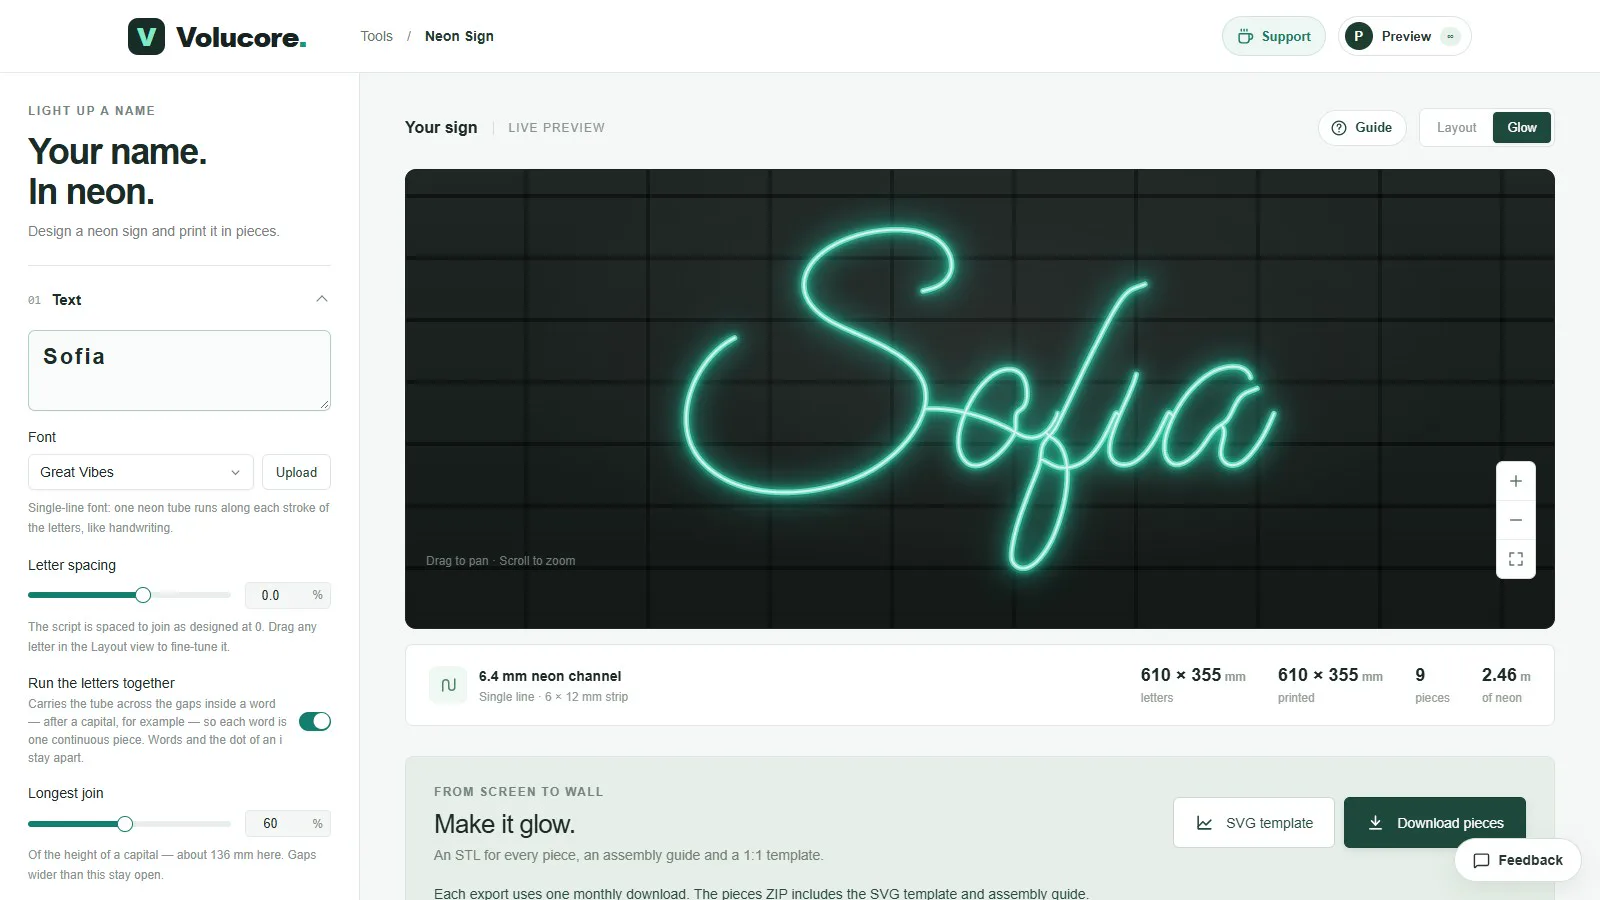
As a worked example, the name “Sofia” in a single-line script at 600 mm letter width comes out at 610 × 355 mm printed, needs 2.46 m of neon and splits into 9 pieces on a 256 × 256 mm bed. Switch to the outline font Chewy and the same name needs far more strip, because every letter is outlined twice.
Step 4: pick the body style
The body is the printed part. Channel only, the default, is just the U-shaped channel that follows the neon: light, fast to print and meant to be mounted on acrylic or a wall. Back plate adds a thin plate in the shape of the letters, and Solid letters makes the letters full height. Choosing the body style compares them.
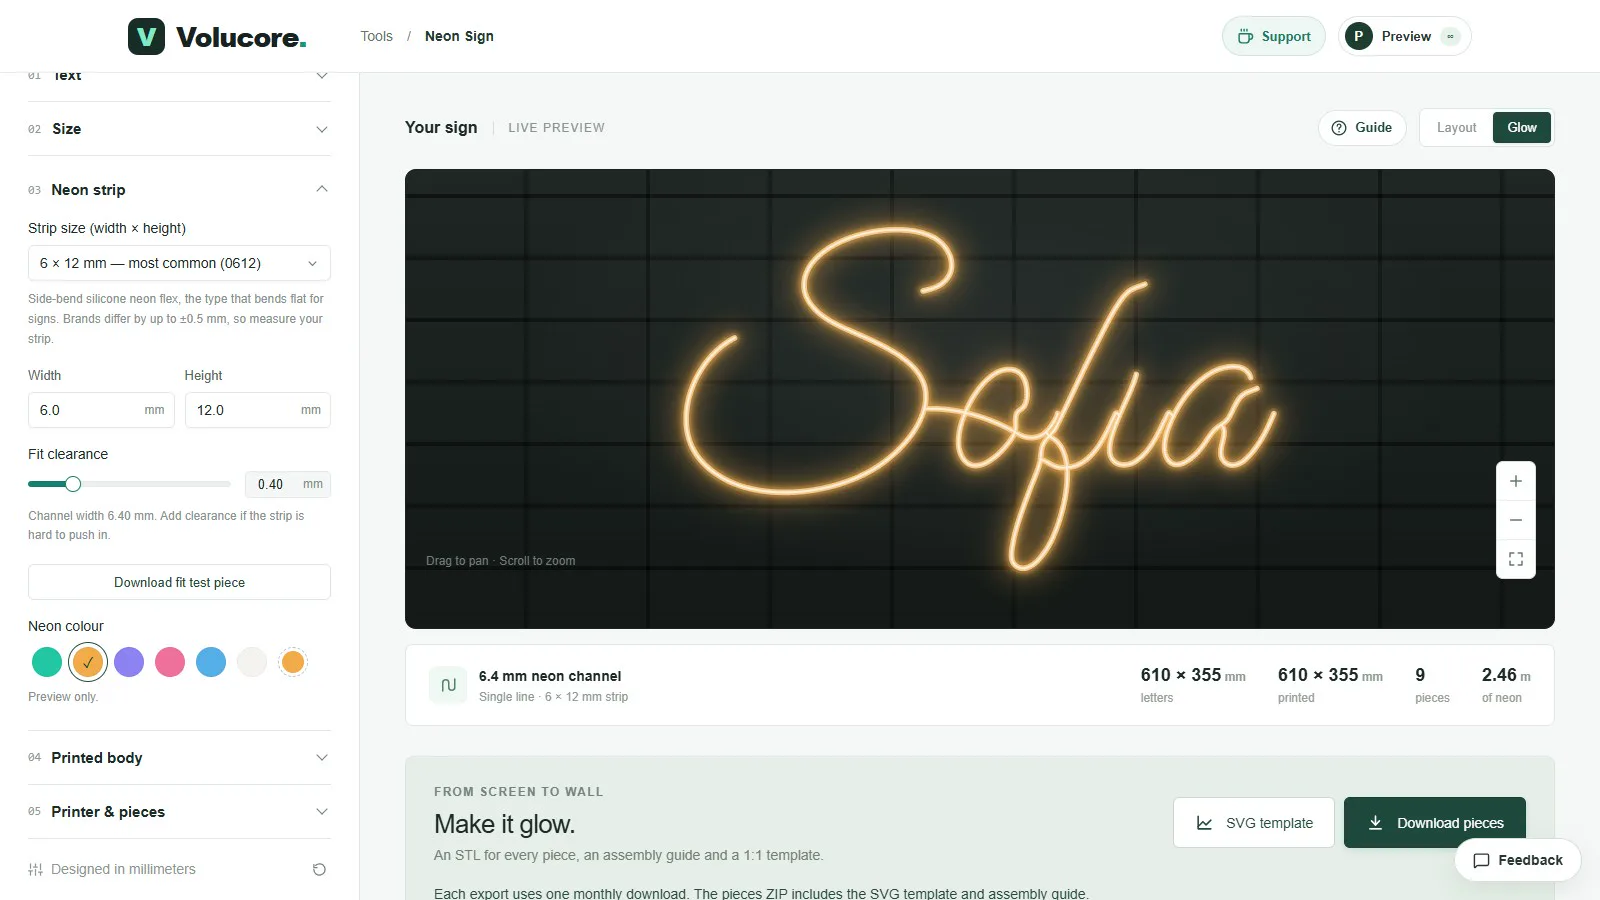
Step 5: tell it your strip and your printer
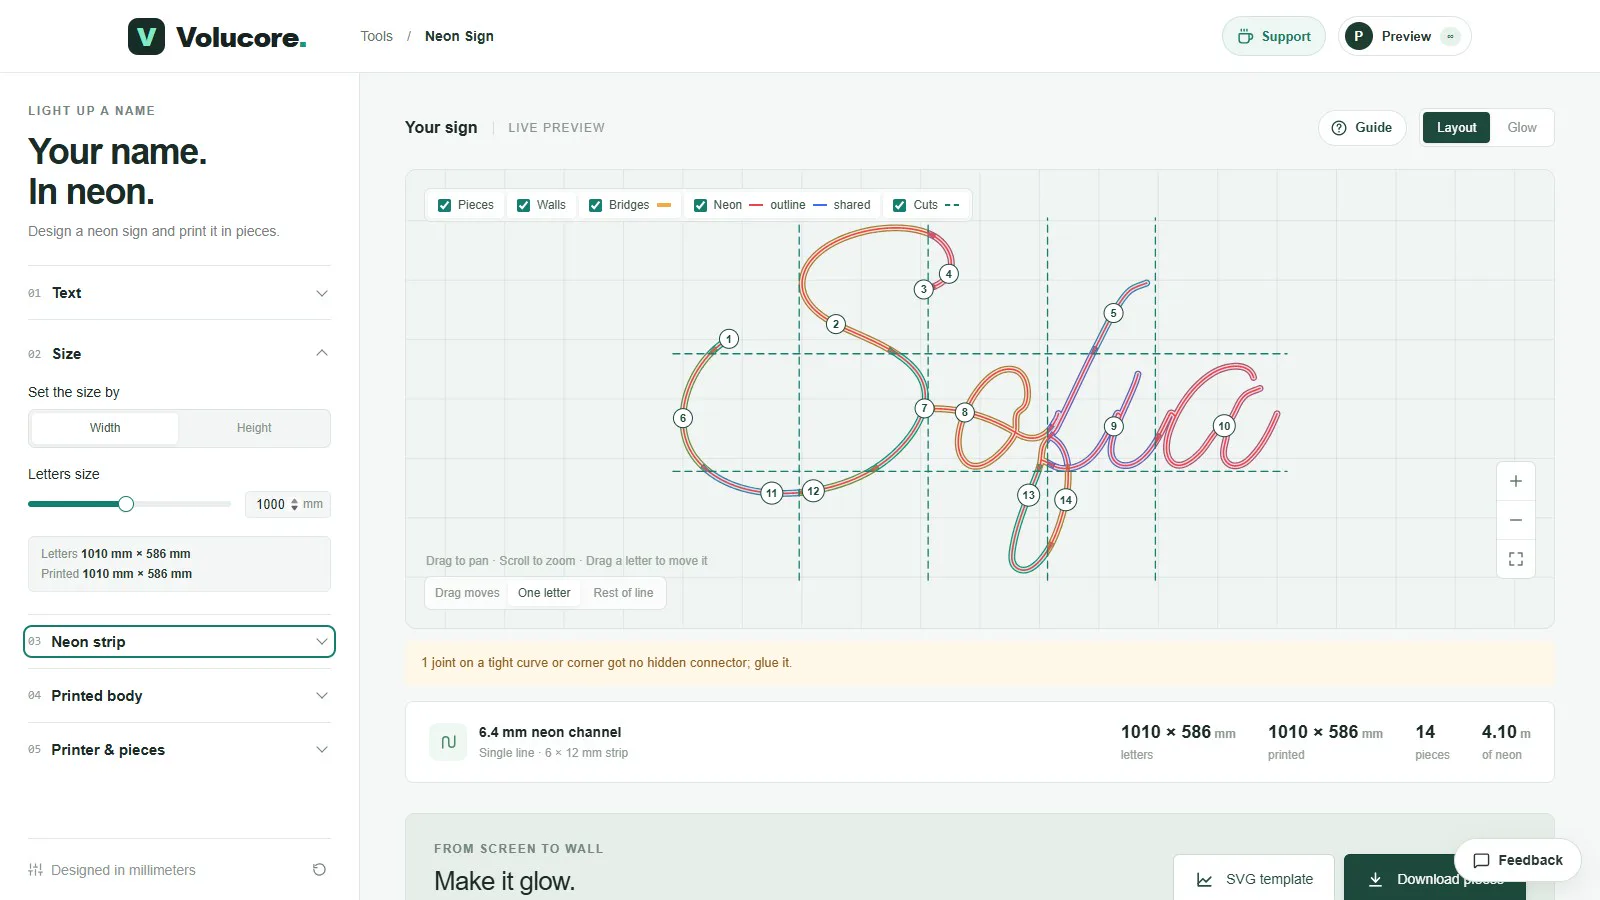
Under Neon strip, choose your strip size (or type the exact width and height) and set a fit clearance. The default is 0.40 mm, which makes a 6 mm strip sit in a 6.4 mm channel: snug enough to stay put, loose enough to push in. Under Printer & pieces, choose your printer or enter your bed size and margin, and leave Split to fit the printer on. The tool cuts the sign into numbered pieces, and with Hidden connectors on it adds a dovetail key in the floor of the channel at every joint; the strip covers it from the front and the wall hides it from the back.
Step 6: check the glow and download
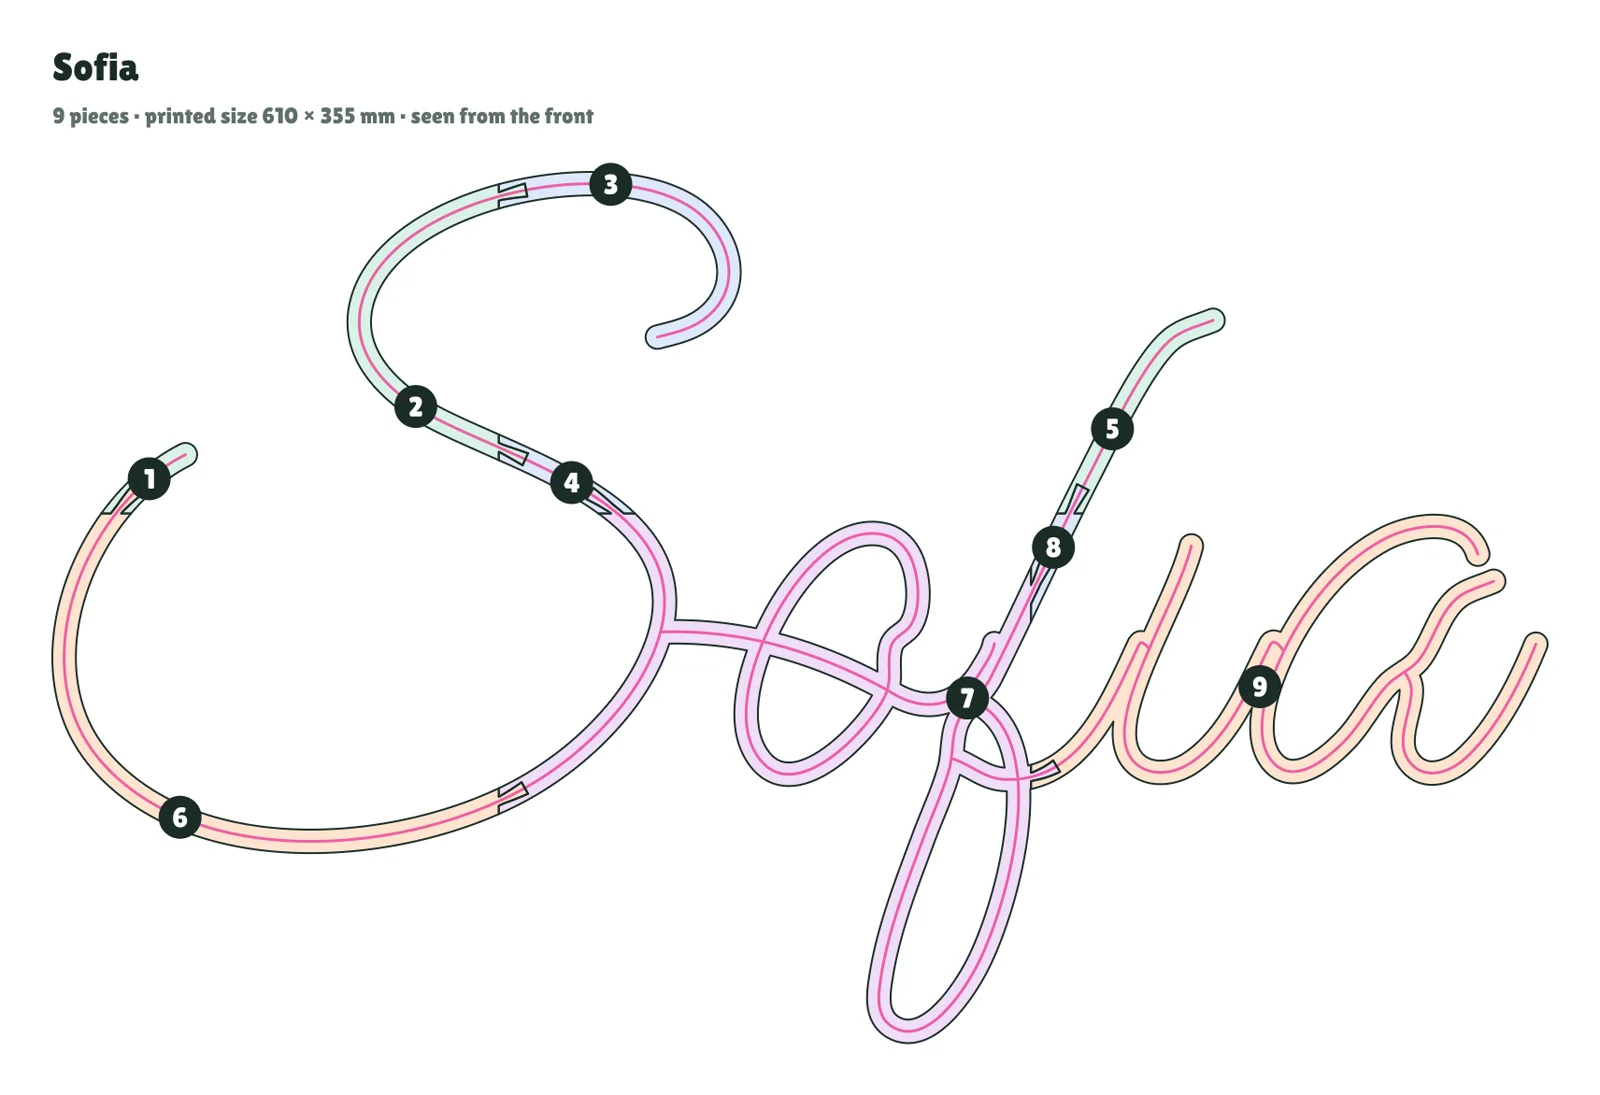
Switch to the Glow view to see the sign lit on a dark wall and try the preview colours. The colour is only a preview; the printed sign is the colour of your filament and your strip. Then download the pieces. The ZIP contains one STL per numbered piece, an assembly guide picture that shows where each piece goes, a 1:1 SVG template and a README with your settings.
Step 7: print the pieces
Print each piece flat with the base on the bed. No supports are needed. A 0.4 mm nozzle and 0.2 mm layers are a good starting point, with the wall settings matched to the tool: a 1.6 mm channel wall is four perimeters at 0.4 mm. Use moderate infill; the base is only 2 mm thick, so a few top and bottom layers do the job. Print settings for neon sign channels goes through material, orientation and the usual problems.
Step 8: assemble the pieces
Lay the pieces out on a flat table following the assembly guide, then join them one at a time. The dovetail keys line the pieces up; a drop of super glue on each joint makes it permanent. Where the tool warns that a joint on a tight curve got no hidden connector, glue it directly and hold it flat until it sets. If you engraved the piece numbers, they are cut into the underside so they never show.
Step 9: fit the strip and wire it
Press the strip into the channel from one end, starting with a free end. Do not stretch it: bend it, and keep to the minimum bend radius in its datasheet. Where the strip runs out of a letter, cut it only at the marked cut points and seal the cut end with an end cap or silicone. Connect the strip to the power supply with the correct polarity. Wire and power an LED neon sign covers the supply size, connectors and safety.
Step 10: mount it
A channel-only sign is light, so mounting is simple: stick it to a clear acrylic sheet, fix it to the wall with standoffs, or hang it with wire. See mounting and finishing a 3D-printed neon sign for the options and for painting the channel white for a brighter glow.
Troubleshooting
| Problem | Likely cause | What to do |
|---|---|---|
| The strip will not go into the channel | Strip wider than the channel, or the print is slightly undersized | Print the fit test piece with a larger fit clearance (try 0.5 to 0.6 mm) and measure the strip with calipers. |
| The strip is loose and pops out | Clearance too large | Reduce the clearance, or add a drop of clear silicone along the straight runs. |
| Pieces do not line up | Warped base or glue in the dovetail | Print with a brim or a clean, level bed, and keep glue off the keys. |
| Dark spots between pieces | A gap in the strip, not the print | Run the strip continuously across joints and cut only at the marked points. |
| The sign looks dim | Dark filament inside the channel, or a weak supply | Use white filament or paint the channel white, and check the supply wattage. |
Questions people ask
How long does it take to make one?
Printing is the long part. A 60 cm sign in nine pieces is typically a day or two of printing on one printer, then an hour or two to glue, fit the strip and wire it. The tool tells you the piece count before you start, and the time depends on your printer and settings.
How much LED neon strip do I need?
The Neon Sign tool shows the length of neon for your exact design, for example 2.46 m for the 610 × 355 mm example above. Buy a little extra for cut-offs and the lead-in to the power supply.
Can I use RGB or colour-changing strip?
Yes, if it has the same cross-section, but it needs its own controller and a power supply that matches its voltage and wattage. The channel only cares about the width and height of the strip.
Does it work with any 3D printer?
Yes. The signs are split to fit your bed, so even a small printer can make a large sign. Choose your printer in the Printer & pieces panel or enter your bed size.
Keep reading
 LED Neon Strip Sizes and Fit for 3D-Printed SignsHow to measure an LED neon strip, why 6 × 12 mm is the common size, how fit clearance works, and how to avoid a channel that is too tight or too loose.
 How to Split a Large Neon Sign into Printable PiecesHow the Neon Sign tool cuts a big sign into numbered pieces that fit your printer bed: bed size, margin, smart or even cuts, hidden dovetail connectors and what to do about warnings.How to Wire and Power an LED Neon Sign (Power Supply, Cutting, Connections)Choose the right power supply for an LED neon strip, work out the wattage from the strip length, cut and seal the strip, connect it safely and test it before you finish the sign.
Written and checked by the Volucore team against the behaviour of our tools. Spotted a mistake or something out of date? Tell us and we will fix it.